PW is having a very sweet and cool giveaway that you must enter by tonight, Wednesday May 20 at midnight! She is giving away 5 Summertime Ice Cream parties in part with Edy’s/ Dryer’s Ice Cream. All you have to do is go to her site and leave a comment on why you would like to win an ice cream party. It is that simple, so hurry over now! She even has a bonus giveaway too, but you’ll have to check out her site to find out what it is. Good luck!
 Why peanut butter, of course!
I had quite a bit of leftover American butter cream from some cupcakes I made recently and I did not want to throw it away. That would be like throwing away money and was something that I was just not willing to do. I knew I had a taste for chocolate, but definitely did not want just any plain vanilla frosting. So I decided to make peanut butter cup cupcakes complete with, from scratch, peanut butter cups.
I was very pleased with how these cupcakes turned out. Not only did they look beautiful, they tasted great too! They had a nice rich, chocolate cake base and the frosting was very light and nutty. I definitely felt like there was a great balance between the chocolate and the peanut butter. Normally I feel like I am eating all icing on cupcakes, but these cupcakes were more balanced.
The peanut butter cups were a breeze to make and definitely added to the cuteness factor. Here in Charleston, it gets pretty humid, so I would not recommend making these cupcakes if you are going to have very humid weather or the icing may start to look wet and shiny like the picture you see here. I guess that is what happens when peanut butter and humidity combine. No amount of powdered sugar seemed to fix this problem but you definitely did not notice flavor wise.
The recipe I used for the cupcakes can be found here while the peanut butter frosting recipe is below along with the peanut butter cups.
Peanut Butter Frosting
Ingredients:
2 sticks unsalted butter, softened
1/4 cup creamy peanut butter, (not all natural)
8 cups confectioner’s sugar
1/2 cup milk
2 teaspoons vanilla
Method
In a stand mixer fitted with paddle attachment cream together peanut butter and softened butter. Add 2 cups of confectioner’s sugar and cream to combine. Add in the milk and vanilla. Combine. Add remaining confectioner’s sugar one cup at a time until mixture begins to achieve a frosting consistency. You may not end up using all of the confectioner’s sugar, depending upon the consistency you want.
Once the desired amount of confectioner’s sugar is added, turn the mixer to medium high speed and whip for 3 minutes until mixed thoroughly and smooth.
Icing can be stored in an airtight container up to 4 days.
Source: Feast on this! original
Peanut Butter Cups
1 package (12 oz.) bittersweet or semisweet chocolate, chopped
1/2 cup peanut butter
2-3 cups powdered sugar
mini muffin liners
mini muffin tins
pastry brush
Method
Line mini muffin liners in the mini muffin tins. Set aside.
In a bowl, stir together peanut butter with confectioner’s sugar, using 1/2 cup of sugar at a time. The purpose of the confectioner’s sugar is to sweeten the peanut butter and to dry out the oils in the peanut butter. You may or may not use all of the confectioner’s sugar, depending on how dry or wet you want your peanut butter to be. I like mine to feel more like the consistency of gum paste or rolled sugar cookie dough. Once you have achieved this consistency, set the mixture aside.
Melt chocolate over double boiler or in microwave for 30 second increments until just barely melted. Stir chocolate together until the heat of the bowl melts the remaining pieces and is smooth.
Using a pastry brush, brush melted chocolate inside each of the mini muffin liners, taking care to coat the liners evenly. Once desired amount of liners have been coated, freeze until set. Repeat process again to create a double chocolate coat on the liners. Freeze again.
Transfer the peanut butter mixture to a Ziploc or pastry bag. Remove chocolate shells from freezer. Cut off the tip of the bag (about the size of a dime) and pipe peanut butter mixture into the frozen chocolate shells until the peanut butter mixture is just below the top of the muffin cup. Repeat with all chocolate shells.
Using either a spoon or a squeeze bottle, pour remaining melted chocolate over each peanut butter filled chocolate shell to make a smooth surface like that of a peanut butter cup. Repeat with each shell. Freeze or refrigerate all peanut butter cups until set.
Once set, remove from the freezer and remove the mini muffin liners, if desired.
Peanut butter cups will keep up to 1 month in the refrigerator or up to 2 weeks in a cool, dry place.
Source: Feast on This! original
 Here is an update of our growing garden. Above is a zucchini flower. We enjoyed fresh picked lettuce in our salad the other night. It was so buttery and tender. While I don’t have any pictures of our fresh herbs, I have been cooking with them like crazy. We had fresh cilantro in our salsa the other day as well as fresh basil on our pizza the other night. So good!
Here is a question for you: If you have indoor vegetables/ herbs, do you wash them before consuming them?
Kevin asked me the other night why I bothered to wash our fresh herbs since we grow them indoors. Hmmm…I don’t know. I guess it is habit. Enjoy the pictures!
Baby Cherry tomato plant:

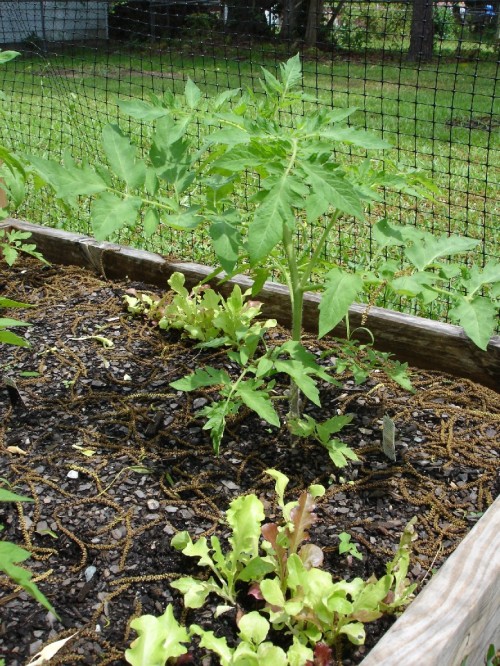
Baby Roma tomato plant:
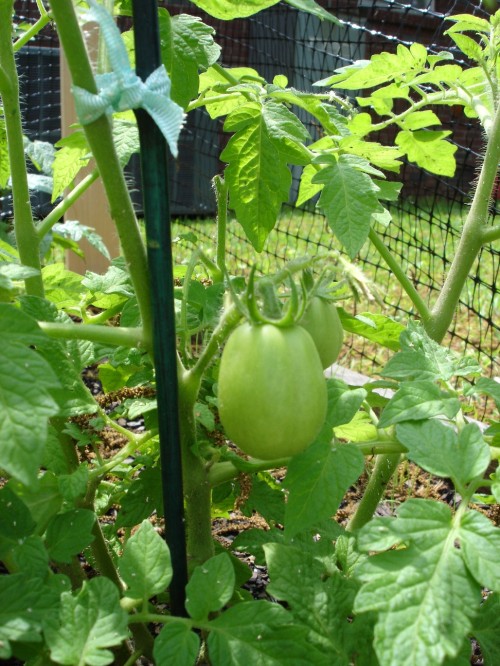
Tomatoes, peppers, and lettuce:
 More tomatoes and lettuce:
 I turned to Kevin and asked, “so how many do you think fell over?” He replied, “maybe two?”. Ha! He is so optimistic! I looked at him and said, “really, I think maybe 4 or more”. We arrived, opened the cooler and ALL of them had fallen over onto each other. We both turned to each other and just laughed.
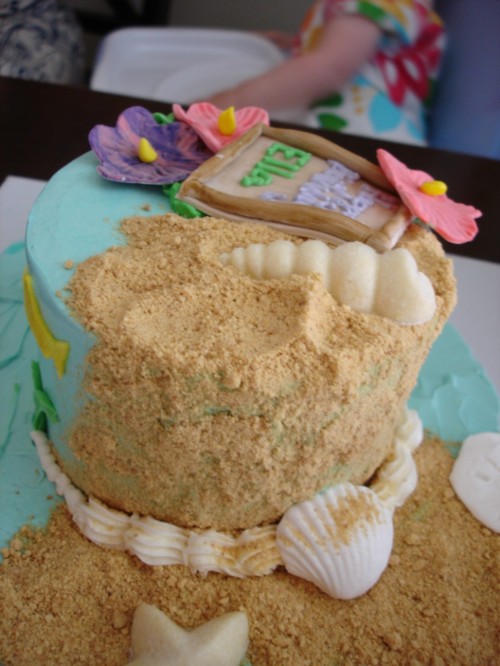
 This past weekend Ella & Grace turned 1 year old. For those of you that don’t know who Ella and Grace are, they are two little girls, one of which I watch on a weekly basis and the other one I casually sit for here and there. Their mom’s asked if I would be willing to cater their joint 1 year birthday bash. How could I say no? The theme for the party: Luau!

It was one crazy, fun filled weekend! I started last week by baking the cupcakes and smash cakes on Tuesday, made the fillings and butter cream on Wednesday, grocery shopped and prepped the food on Thursday, then cooked all day Friday! The party, complete with food and cake covered babies, was a hit!
 On Friday night, Kevin and I delivered all of the food to Grace’s house to keep in the fridge until Saturday since mine was to be packed with cupcakes and two smash cakes. We then went downtown Charleston and enjoyed walking around in the nice warm evening weather. We stopped by a new frozen yogurt shop and each enjoyed a small treat. It was a nice date. 🙂
 Saturday morning we woke up early, enjoyed a nice breakfast of waffles on our front porch and immediately set our mode’s into high gear for the party. By the time I finished icing all of the cupcakes and decorating the smash cakes I felt like I had absorbed so much butter and sugar just through my skin and I had not had one single bite! We showered, dressed in our “Luau” appropriate clothes and loaded up the car.
 Kevin had made a special “carrier” for my ice cream cone cupcakes since they don’t fit securely in a cupcake carrier or in muffin tins. Little did I know that in order for his contraption to work, I had to keep it pulled tight….it was constructed of aluminum foil, cardboard, and duct tape. (Gotta love it!) So I put the ice cream cone cupcakes in the cooler thinking that they would be fine in this contraption and make the trip. There was only a dozen of them… why wouldn’t they make the 15 minute drive? Hmmm….what do you think?

For those of you that don’t know, we drive a Jeep. Yeah, a freakin’ Jeep! Definition of “Jeep”: a vehicle that finds every damn bump in the road, shakes on a smooth road, and is pointless to even turn on the A/C’. Oh, and to make matters worse, we are undergoing MAJOR construction in Charleston right now so our roads are crappy.
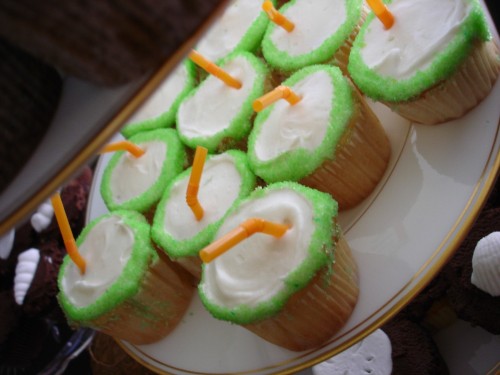
About a mile away from Grace & Ella’s party, I turned to Kevin and asked, “so how many do you think fell over?” He replied, “maybe two?”. Ha! He is so optimistic! I looked at him and said, “really, I think maybe 4 or more”. We arrived, opened the cooler and ALL of them had fallen over onto each other. We both turned to each other and just laughed. Note to self, bring the butter cream in a pastry bag and ice any future ice cream cone cupcakes at the destination!
 (I tried to fix them the best I could with no extra icing to work with. 🙂 )
 All of the other cupcakes, food, and the two smash cakes made it perfectly. In the end all that mattered were that the smash cakes arrived untouched, which they did since I held them the whole way. The party turned out better than I had planned and everyone had a great time! The girls definitely enjoyed their cakes. I wish I could say that I don’t want to see butter cream for a very long time, but considering I deal with it on a weekly basis, I doubt that is going to be possible.
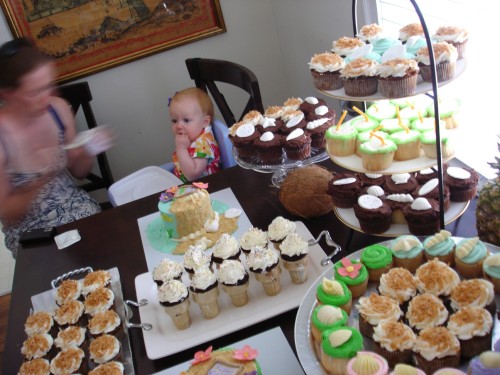
The food menu:
Pulled Pork Barbecue served with homemade sauce, corn muffins, and buns
Slow-cooked Baked Beans
Horseradish Potato Salad
Coleslaw
Broccoli Salad
Pico de gallo, guacamole and chips
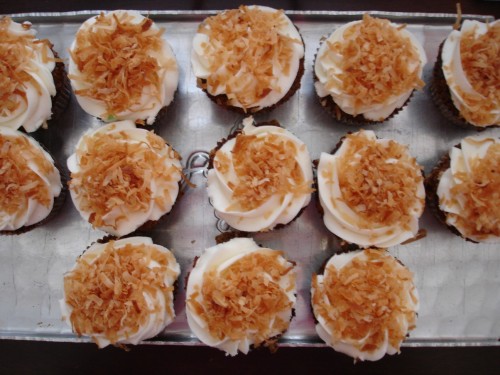
The cupcake menu: (All butter cream was European butter cream)
Carrot cake with cream cheese frosting (recipe can be found here)
Margarita with lime frosting
Devil’s Food with chocolate ganache and vanilla butter cream
Vanilla bean cake with vanilla butter cream
Ice cream cone cupcakes with devils food cake and vanilla butter cream
Smash Cakes:
Grace’s cake was strawberry banana with vanilla butter cream
Ella’s cake was blueberry with vanilla butter cream
Recipes
Sea Shells– made using a plastic mold purchased from Michaels and melted Baker’s brand white chocolate bars
Sand dollars– made by rolling gum paste to 1/4″ thick, cutting with round cutter, and hand drawing the design
Hibiscus flowers, fish, and Sign– made by coloring and molding gum paste into desired shapes.
Sand- graham cracker crumbs
Vanilla Cake
Yield: Three 9″ rounds, 1 half sheet or 24 cupcakes
Ingredients:
2 cups cake flour
1 3/4 cups plus 1 1/2 teaspoons All-purpose flour
2 1/4 teaspoons baking powder
1 cup butter, unsalted
3 cups sugar
3/4 teaspoon salt
1 tablespoon vanilla extract (I added 1 teaspoon vanilla bean paste in addition)
1 cup egg whites or pasteurized egg whites in liquid form
1 1 /2 cups milk
Method
Preheat the oven to 350. Spray nonstick cake pans, muffin tins, or sheet pan with nonstick spray. Set aside.
In a large bowl, sift together cake flour, all purpose flour, and baking powder. Set aside.
In the bowl of a stand mixer fitted with a paddle, combine the butter and sugar and beat on medium speed until light and fluffy.
Add the salt and vanilla.
Set the mixer to low speed and gradually add the egg whites, scraping often.
Alternately add the flour mixture and milk to the butter mixture in two batches, starting with the flour. Scrape down the bowl between each addition and beat until thoroughly combined. Set the mixer to medium high speed for about 20 seconds then stop and scrape the sides of the bowl.
Divide the batter evenly between the cake pans or muffin tins. For 9″ cake pans, bake 1 hour or until a toothpick comes out clean. Cupcakes take 20 -25 minutes or until they spring back after being touched.
Allow cakes to cool for 20 minutes until flipping out of pan. Cool completely before icing.
Variation:
To make the margarita cake, add 1 tablespoon of key lime juice to batter and zest 1 key lime. Omit the vanilla bean paste.
To make the strawberry banana cake, fold in 1 smashed banana and 1/2 cup of pureed strawberries to finished batter before dividing into pans.
To make blueberry cake, fold in 1 cup of pureed and strained blueberries to finished batter.
Chocolate Devil’s Food Cake
Yield: Three- 9″ rounds, 1 half sheet, or 24 cupcakes
Ingredients:
2 2/3 cups All-purpose flour
1 1/4 cup plus 2 tablespoons unsweetened cocoa powder
2 teaspoons baking powder
1 teaspoon baking soda
1 teaspoon salt
1 cup sour cream
1 teaspoon pure vanilla extract
1 teaspoon pure almond extract
1 cup butter
2 cups sugar
2 eggs
1 1/2 cup strong coffee
Method
Preheat the oven to 350. Spray pans to be used with non stick spray and set aside.
In a large bowl, sift together flour, cocoa powder, baking powder, baking soda, and salt. Set aside.
In a separate bowl, combine the sour cream, vanilla, and almond extract. Set aside.
In the bowl of a stand mixer with paddle attachment, combine butter and sugar and beat on medium speed until smooth and creamy.
Set the mixer to low speed and add the eggs, one at a time, scraping between each addition.
Alternately add the flour and sour cream mixtures to the butter mixture in two batches, starting and ending with the flour mixture. Scrape down the bowl after each addition.
Gradually pour in the coffee. Scrape down the bowl and beat until thoroughly combined.
Divide the batter evenly between the pans. For 9″ cake, bake 1 hour or until toothpick comes out clean. For cupcakes bake 20-25 minutes or until they spring back after being touched.
Allow cakes to cool for 20 minutes before flipping out of pans. Cool completely before icing.
Recipes adapted from: The Confetti Cakes Cookbook by Elisa Strauss
European Butter Cream
Yield: enough to frost 24 cupcakes
Ingredients:
22 ounces granulated sugar
9 ounces egg whites, or pasteurized egg whites in liquid form
20 ounces unsalted European butter, cut into small chunks, half cold half room temperature
1/2 teaspoon cream of tartar
2 tablespoons vanilla powder
Method
In the bowl of a stand mixer, combine sugar, egg whites, cream of tartar and vanilla powder. Whisk together over a pot of boiling water, whisking constantly until mixture is heated to 120 degrees and the sugar crystals have completely dissolved.
Place the bowl on the stand mixer and fit with whip attachment.
Whip the egg white sugar mixture on high speed until stiff peaks form and the bowl cools down.
Once stiff peaks have formed, set mixer to low speed and slowly add in your butter 5 ounces at a time. Once you have added all of your butter set your mixer to medium high speed and continue to whip meringue/ butter mixture until the mixture has emulsified together and has achieved a smooth creamy texture.
If your butter cream is too warm, your mixture may become too liquid. If this happens, simply refrigerate your mixture for 10 minutes, then try re-whipping again. It may come together some days and others take a while depending on the temperature of your kitchen and humidity.
Variation:
To make margarita frosting, add 1 teaspoon of lime juice to every 1 cup of European butter cream. Use green sanding sugar to “rim”cupcakes.
Source: Feast on this! original
Chocolate Ganache
Yield: 2-3 cups
1 cup heavy cream
9 ounces bittersweet chocolate, chopped
1 tablespoon light corn syrup
Method
Place chocolate in a glass or metal bowl. Set aside.
Scald cream in microwave safe bowl or in a saucepan over medium high heat on the stove.
Gently pour over chocolate and let set for 1 minute.
Whisk together chocolate and heavy cream until smooth and uniform in consistency. Refrigerate for at least 2 hours or until set.
In bowl of stand mixer fitted with paddle attachment, add the set up chocolate cream mixture. It will have a very thick consistency similar to that of truffles.
Mix on medium speed until mixture begins to soften. Add in 1 tablespoon of light corn syrup to help soften and smooth the mixture. You may need to add more to get your desired consistency for icing cupcakes.
Pipe or smooth onto cakes or cupcakes.
Source: Feast on this! original recipe
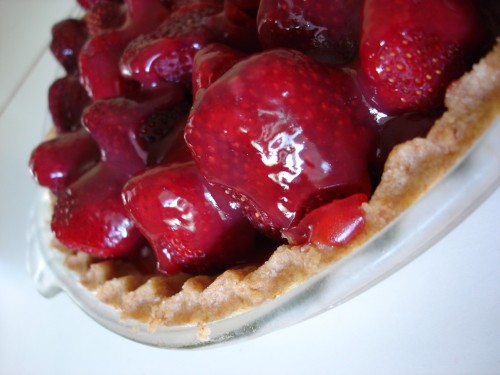 As promised, here is the recipe for strawberry pie. It was so delicious and refreshing. I decided to make our crust using part whole wheat pastry flour and part all purpose flour. You may use 100% all purpose, if desired. I am just always looking for a way to add more whole grains to our diet. I have had strawberry pies made with graham cracker crusts before as well. They are delicious, but I wanted the flaky pie feeling this time around.
You can also cut the amount of sugar by 1/3 of the indicated amount, especially if your strawberries are as sweet as mine. Next time I might try subbing agave nectar just to experiment to see if it would change the flavor or alter the consistency at all. We enjoyed our pie with a dollop of fresh whipped cream. I am sure a scoop of fresh churned ice cream would also be delicious!
Strawberry Pie
crust:
2 cups all-purpose flour (1 used 1/2 whole wheat pastry and 1/2 all-purpose)
2 tablespoons sugar
1/2 c. canola oil
5 tablespoons milk or water
dash salt
Method
Stir together flour, sugar and salt. Make a well in the center of the flour mixture. Pour oil and milk or water. Stir lightly with a fork. Form into a ball and flatten slightly.
Roll between two pieces of parchment paper or pat into bottom of 9″ pie pan with hands. Prick bottom and sides of pie crust with fork.
Bake at 425 for 10-12 minutes or until golden brown. Cool completely.
Strawberry Filling
1 cup fresh strawberries, crushed
1 cup water
3/4 cup sugar
3 tablespoons cornstarch or arrowroot
5 cups fresh berries (see note)
Method
Combine crushed fresh strawberries and cook with 1 cup water for about 2 minutes on medium heat. Strain through a sieve reserving the berry juice.
Return juice to saucepan and add sugar and cornstarch. Whisk together. Cook and stir or whisk until mixture is smooth, thickened, and bubbly.
Place 2 1/2 cups of fresh strawberries in baked and cooled pie shell. Pour half of the berry sauce over the strawberries. Repeat layers with remaining 2 1/2 cups of strawberries and remaining sauce. Chill.
Serve pie cold with fresh whipped cream or ice cream.
Note: You may slice all of your berries for your pie or slice only the berries which are hid under the whole berries on top.
Source: Better Homes and Gardens New Cookbook
 This past weekend Kevin and I went strawberry picking at a local strawberry patch. Oh my goodness, talk about the best breakfast ever! We grabbed some coffee on our way to the patch then sat in the patch noshing on the most delicious berries. I’m glad they don’t weigh you on the way out because I am sure we ate a couple pounds each!!
The first row we started picking was very abundant. We picked some nice ripe strawberries and each had about two baskets filled. We then went back for two more baskets each and started where we left off, which was about half way down the row. The berries were ok. Not as good as the beginning of the row and we figured out that it was because other strawberry pickers would start at the beginning of the row, pick half way down, then stop. We would start at the end and pick our way towards the beginning, hence why this row was picked over already.
Kevin and I then decided to pick up our baskets and hit up another row a few down the line. Holy jackpot! You should have heard us in the patch “oh, my look at the size of this” and “wow, that is giant” or “can you believe how big this one is?” and “oh my gosh, this is the best thing I have ever put in my mouth!”. Were we in a berry patch or elsewhere? GET YOUR MIND OUT OF THE GUTTER!!!
We finished picking with Kevin practically dragging me out of the patch. “Just one more, please?'” I begged. “Keep walking, keep walking…don’t look down…keep walking”, he would say. We loaded up the Jeep and headed home.
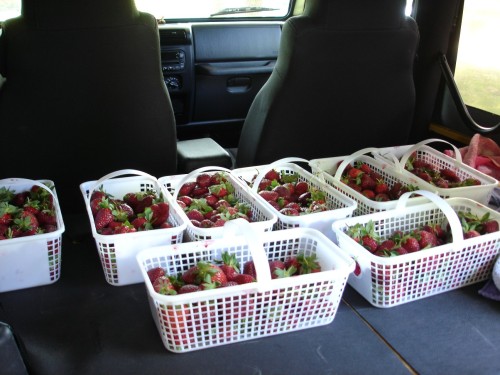 (These baskets are only half full because we dumped out the other half into other containers so they would not smash on the way home. There are more strawberries in my house too!)

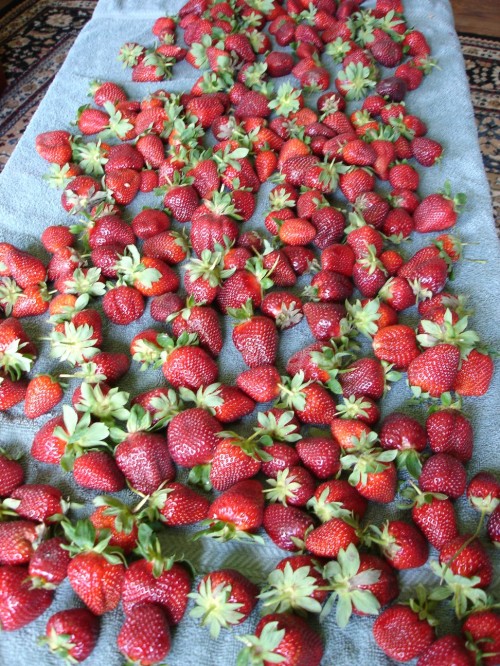
Once we unloaded, I took a picture of all of our berries and weighed them out. We ended up with close to 50 pounds of berries!!! When life hands you strawberries, what do you make? No, not strawberry daiquiris, but that sounds good….strawberry jam!! So all afternoon I prepped for jam making and spent my Sunday canning and freezing strawberry jam.

I also made a fabulous strawberry layer cake, strawberry pie, and of course…chocolate covered strawberries. These recipes as well as the recipe for canning and freezing jam are to follow the rest of the week.
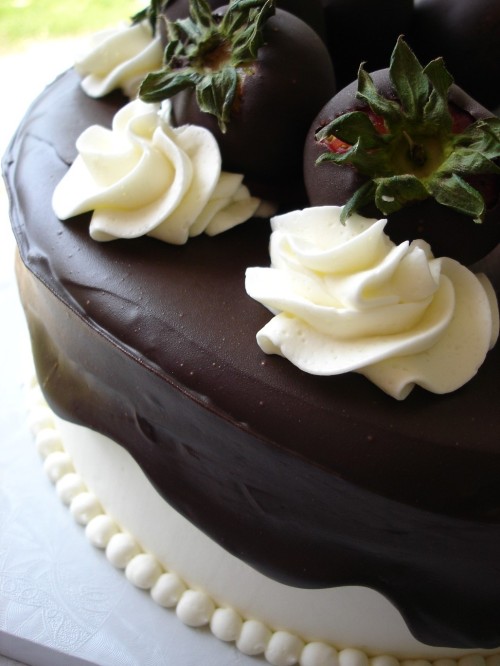 To find a strawberry patch in your area or other produce, visit: http://www.pickyourown.org/ or visit your classified section of your local newspaper.
 Yesterday was Cinco de Mayo so just like everyone else, we celebrated with a wonderful dinner. I love Mexican food, but hate the calories and fat from traditional chips, re-fried beans, and all of the cheese. One thing i have learned is that you can take the original version of any dish and lighten it up just by subbing out ingredients or changing the method in which you cook the dish. For example, we chose to eat Guiltless Gourmet baked corn tortilla chips, black beans (made from dried beans at home) as well as subbing Oikos Greek yogurt for the traditional sour cream, picking whole grain wraps instead of corn and using a whole grain rice pilaf by Kashi for the filling.

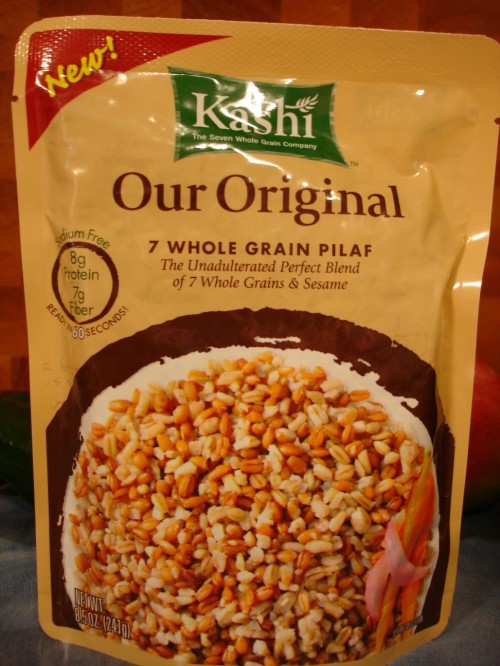
For those of you who have not yet tried the Kashi Pilaf Blends, now is the time to try them! They are so good and packed full of nutrients. Their original 7 whole grain pilaf contains a blend of whole oats, long grain brown rice, rye, hard red winter wheat, triticale, buckwheat, barley, and sesame seeds. It is full of fiber, sodium free, and packed with 8 grams of protein per serving! I bought the original since I like to control my own sodium level but I am sure the others are just as delicious. Adding this to the inside of our enchiladas was WAY better than your average rice.
 If you would order this meal in a Mexican restaurant, it would probably have 3x as many calories and fat as the version we made. Plus, we indulged in some chili lime Guiltless Gourmet Chips. So good! You can definitely enjoy this version of enchiladas guilt free!
Fiesta Enchiladas
Filling
1/4 c. onion, finely chopped
1/2 c. pepper medley, (I used the 365 brand frozen pepper strips)
1 clove garlic, minced
2/3 c. black beans
3/4 c. corn, canned no salt added
1/2 package Kashi Original 7 Whole Grain Pilaf
1/4 c. homemade enchilada sauce, recipe follows
Juice of 1 lime
2 tsp. cumin
1/2 tsp. paprika
1/2 tsp. white pepper
1/2 tsp. black pepper
1/4 tsp. chili powder
bunch of cilantro, chopped
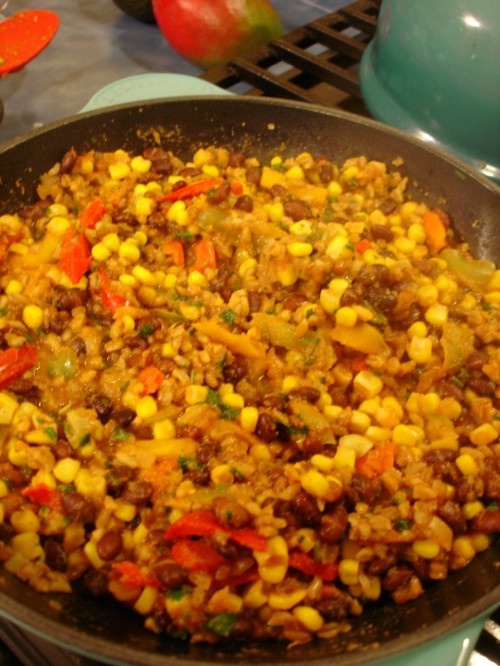
For the enchilada preparation
Enchilada Sauce
cheddar cheese
Enchilada Toppings
salsa
avocado
green onion
shredded lettuce
jalapeno
lime
Method- for the filling
Spray a nonstick skillet with cooking spray and begin to soften onion and pepper medley over medium heat. Add in the minced garlic and stir. Once onions and peppers are soft and tender add in the corn, black beans, and Kashi rice blend. Stir to combine and add seasonings. Stir to evenly coat ingredients then add juice of 1 lime, enchilada sauce and cilantro. Mixture will become thick. Cook until all ingredients are evenly coated and hot.
Prepare a 13 x 9 inch baking dish with cooking spray and set aside.
Divide enchilada filling into 5 equal portions. Scoop each portion onto the center of a whole grain tortilla. Wrap the tortilla like a burrito, except leaving the ends open. Set in baking dish and repeat.
Once all of the filling has been wrapped up in the tortillas, pour the enchilada sauce over the tortillas and sprinkle with cheddar cheese if desired.
Bake 375 for 15- 20 minutes until hot and bubbly. Serve with desired condiments.
Enchilada Sauce
1 -12 oz. can plain tomato sauce, less sodium
1 small yellow onion, minced
1 small clove garlic, minced
1 jalapeno, finely minced (seeds removed) or 1 tbsp. finely minced poblano pepper
handful of chopped cilantro
1 tablespoon cumin
1 tsp. chili powder
dash paprika
dash white pepper
dash black pepper
salt, to taste
Method
Coat a small saucepan with non stick spray and cook the onion and garlic until softened. Add in the jalapeno or poblano pepper. Continue to cook for a few minutes longer until pepper softens. Add the tomato sauce and all of the seasonings except for the cilantro. Cook mixture over medium low heat for about 10 minutes or until hot. Stir in cilantro and set aside until ready to use.
Source: Feast on This! original recipe
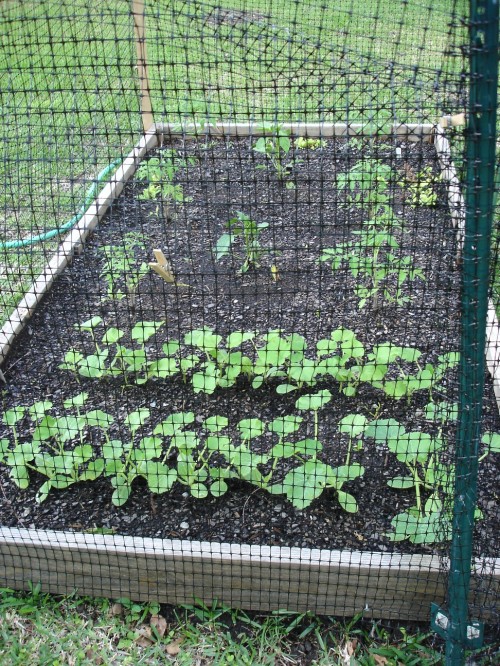
 This isn’t a recipe post of any kind. But it should definitely still be considered a food post considering I am growing vegetables! This is our garden that is growing bigger every day.
 You will notice our lovely “homemade” fence. We have the peskiest squirrels ever here in Charleston. They are just that, pests! They loved our garden from day one. A place to bury their nuts and grab a bite on a plant in the process.
 I did some research online and took advice from another blog to feed the birds and squirrels. BIG MISTAKE. Yeah, the birds were happy, but the squirrels proceeded to take the peanuts I put in the yard and bury them in the garden!!! AHHHHHH!!! To top it off, they swung on a that I hung outside of my kitchen window and it fell to the ground and broke. Birdseed was everywhere! The little punks loved it too. They just sat around the circle of birdseed munching. All I have to say is that I doused the spilled birdseed with cooking oil and a TON of cayenne pepper! I hope their little hiney’s were on fire the next day. 🙂

We then fenced in our garden allowing it to still be watered but hopefully to keep the birds and squirrels out.
Last week I walked out to inspect the garden and noticed that there were fresh holes around the tomato plants and pepper plants. Funny, how are animals getting in when the garden is fenced? Kevin decided to set up our web cam looking out the window facing the garden, so that we might catch some action.
Well, no need for that! Later on that day when I was working out, I looked out the window and saw a squirrel eyeing our garden with a nut in his hand. He was walking around the garden just staring at it. He then proceed to lift the fence and crawl under with his nut in his mouth!!! What the heck?? I then ran out the back door with a broom in my hand racing for garden. Yep, crazy lady chasing a damn squirrel!
The squirrel went crazy! After he realized that he was trapped in the garden with no where to go and no idea how to get out he started pouncing off each of the four posts holding up the fence to the garden. He finally managed to weasel his way under the fence and get out before I had the chance to whack him. Ugh, it would have given me great pleasure to whack him to. How dare he chew on my plants and bury his pecan nuts in my garden!!
He proceeded to run up a tree and watch me…or his nut that he left behind on the ground. I moved his nut a few feet away from my garden, ran inside and grabbed some bug poison, then doused his nut in poison. Take that you punk! After I went back into the house, the squirrel proceeded to come back down the tree and circle my garden again. I ran outside, let him have it again, then returned to the house. He did this about two more times, then gave up. Thank goodness!
See, I am not a violent or mean person, but if you mess with my garden and the possibility of growing my own vegetables I will get you! Don’t dish it out if you can’t take it.

 Kevin has an eating problem. Yes, you read that correctly. Not a drinking problem, but an eating problem. They boy can’t eat anything without it falling off of his fork, squishing out of a bun, taco shell, or crumbling it to pieces. The funny thing is that he gets so frustrated too. He seriously thinks that either I or his food is out to get him. I swear it takes him about three times longer to eat than I do.
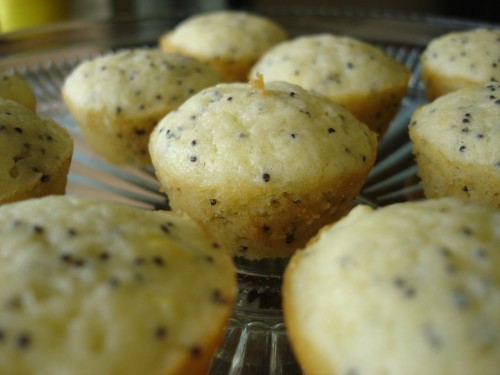
Kevin also has another problem…eh…issue…whatever. According to him he does not produce saliva when he eats. Yes I know, just what you wanted to know, how much saliva he produces. It is true. He has to drink with about every bite unless what he is eating is a wet item. I can’t understand this. My mouth naturally produces more whenever I eat anything dry like bread. I guess he is missing that gland? gene? whatever it is. Anyway, you’ll be happy to know that these muffin bites are plenty moist and make him happy.
So on my quest to make his eating process more enjoyable and to hear less complaining, I decided to make bite sized muffins. He can pop them in his mouth, there is no wrapper or fork to deal with and therefore no crumbs. He can do this, right??
Lucious Lemon Muffin Bites
1 c. all purpose flour, sifted
1 teaspoon baking powder
dash sea salt
1/2 c. butter
1/2 c. sugar
2 eggs, separated
3 tablespoons lemon juice, freshly squeezed
1 teaspoon lemon zest
1 tablespoon poppyseeds
2 tablespoons decorating sugar
Method
Sift together flour, baking powder, and salt. Add poppy seeds to flour mixture.
Cream butter and sugar until light and fluffy. Beat in egg yolks one at a time, scraping the bowl as needed. Blend well.
Add flour mixture alternately with lemon juice and zest, beginning and ending with flour mixture.
In a separate bowl, beat egg whites until stiff peaks form. Carefully fold egg whites into the lemon batter.
Fill greased mini muffin tins 2/3 way full and sprinkle with decorating sugar.
Bake 375 for 10- 15 minutes or until a toothpick comes out clean.
Source: Feast on This! recipe
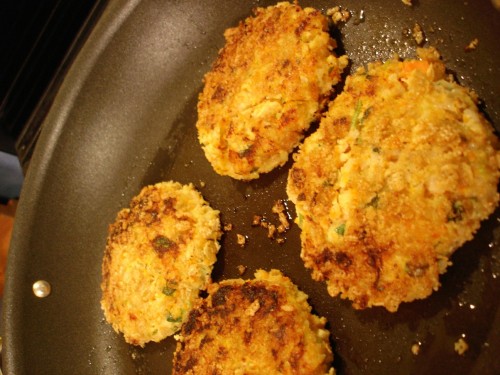
Salmon cakes have now become a “regular” meal in our house. I used to shy away from salmon until recently after discovering all of the wonderful health benefits that salmon has to offer. I have always been very picky about my seafood. I love shrimp, crab, most mild white fish such as tilapia and flounder as well as mahi mahi, clams, and on occasion, scallops. Salmon has never seemed to make the list.
I think my dislike of salmon stems back to an experience I had with it in college. My mom told me that a cheap meal would be to buy a can of salmon, add some breadcrumbs, an onion, celery, egg, seasonings, and to make cakes. I followed her directions and remember that it was gross! I don’t know what I did wrong, but I never bought salmon since. I think I threw it out and ended up eating cereal for dinner.
Recently I discovered salmon in the foil packages in the tuna aisle. You know the ones I am talking about. You don’t have to drain them and can pack them in your lunch. Well I picked up a pack one night. We tried the Chicken of the Sea brand. It was phenomenal! It was mild, flaky, and so moist when we cooked it up into cakes. There website also has some great recipes that I am eager to try like salmon tacos!
Now that I know how great this brand tastes, I will definitely be buying more. There was no messy clean up and I definitely didn’t get any fish juice on myself….definitely a bonus! I think this salmon would taste great in a pasta salad or with fettuccine as well. For now I leave you with a recipe. Enjoy!
I followed their recipe on the back of the package making a few small changes in order to pack more veggies into our dinner. You can find the original recipe at Chicken of the Sea. Below you will find the recipe with my changes.
Easy Salmon Cakes
1/4 cup finely chopped red bell pepper
1/4 cup finely chopped green onions (I used vidalia onions here as well)
1 stalk celery, finely chopped (my addition)
1 medium carrot, finely chopped (my addition)
1/4 cup mayonnaise (I subbed Oikos Greek Yogurt to add more protein)
1 Tablespoon freshly squeezed lemon juice
1/4 teaspoon seasoned salt
1/2 teaspoon garlic powder
Dash cayenne pepper
1 tsp. onion powder (my addition)
Dash white pepper (my addition)
1 tsp. minced fresh ginger (my addition)
1 (7.1-oz.) pouch Chicken of the Sea® Premium Skinless & Boneless Pink Salmon Pouch
1 large egg, beaten
1 egg white (my addition)
1 cup seasoned breadcrumbs (I used 3/4 c. panko breadcrumbs in the cakes and sprinkled more on the outside)
3 Tablespoons butter (I used olive oil to pan fry with instead of butter)
Method
In a bowl combine seasonings, Greek yogurt, salmon, eggs, and lemon juice. Set aside.
In a saute pan over medium heat, saute onion, celery, red pepper and carrot until just tender. Remove from heat and let cool to room temperature.
Add breadcrumbs to salmon mixture and stir. Add cooled sauteed vegetables and mix thoroughly. Chill mixture for 30 minutes.
In a saute pan over medium low heat add olive oil or butter. Divide mixture into an even amount of cakes. Pat with a little additional panko, if desired. Once the pan is hot, add the salmon cakes and pan fry until golden brown. Flip and continue to cook until golden brown on the other side. It takes about 3-4 minutes per side.
This makes about 4 servings or 10- 12 small cakes.
Source: adapted from Chicken of the Sea